An electric water heater is one of the most essential appliances in almost any home and it provides the household with hot water, without which life, in this day and age, is almost unimaginable. There are various types of water heaters on the market from countless different manufacturers, so be sure to consult, if possible, an experienced plumber or electrician on which brand is best and what size and type is the most optimal for your home. If you don’t have any experience in plumbing or electrics, it is highly recommended to call a professional to install it for you.
When to Get a New Water Heater?
Before fully embarking on getting a new water heater, first make a maintenance check on your old one. First of all, check if you are not getting warm water it could be that your heating unit is dead and you need to replace it with a new one. If there is leaking, check the joints, the release valve, and the t&p valve on the water heater. If there is water at the connections try tightening them, or replacing them with new ones if the water is coming out of the valve itself. In the worst case, if the tank is leaking from limescale buildup or some other cause, there is no way around buying a new water heater. If you checked everything and all looks fine, it might be an electrical issue that is not even related to your water heater.
Before You Begin
Before installing a water heater, be sure to get all the required permits! You will need to get a primary water heater permit, which is mandatory, at your building or planning department which costs from 20 to 100$. Depending on your location and the type of building where the installation is being carried out, you might need additional permits. After you have finished installing your water heater, an inspector will come to see if everything is installed properly and in compliance with the local codes and regulations.
Disconnecting Electrical Supply and Water Lines
If you are replacing your old heater with a new one, or even just replacing the expansion tank, you will first need to disconnect the electrical supply and the water lines to the unit, so you won’t get electrocuted or flood the whole room. If you are not sure how to do that, you can call our team of experienced electricians to troubleshoot the problem for you.
- Disconnecting the electrical supply
Turn off the switch on the main circuit breaker panel which provides the electric water heater with power. Use a circuit tester to make sure you turned off the correct switch, and that there is no more electricity in the wires. It’s highly recommended to label the wires or take photos of the setup so you will have an easier time when connecting them to the new heater.
2. Shutting water Lines
To prevent burns from scalding water, before you shut off the water supply, turn the faucet on hot until all the hot water is out of the tank. Now you can turn off the water supply. The water supply is usually on the top right of the heater and is turned off by rotating the handle of the valve counterclockwise as far as it will go. After you’ve done that, attach a garden hose to the drain valve at the bottom of the water heater, open the valve and empty the remaining water into buckets or directly into the drain. Also, you can open the faucet again and the t&p valve to accelerate the process.

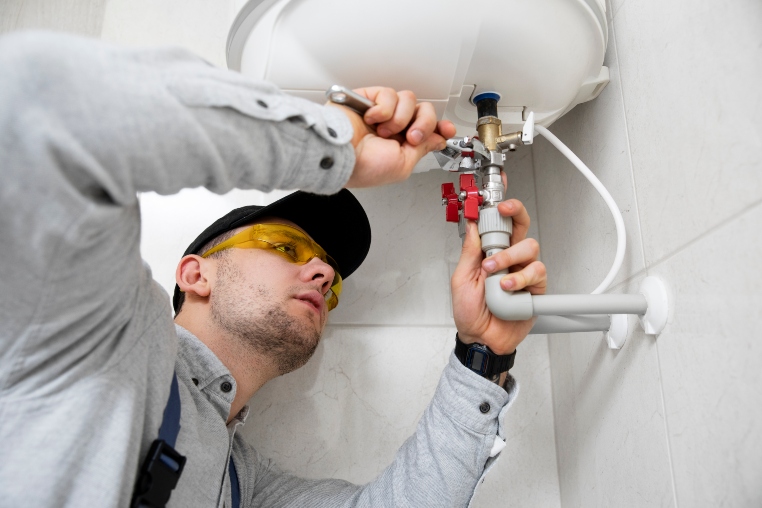
Water Heater Expansion Tank Installation
The expansion tank sometimes called a thermal expansion tank, is an additional component of the water heater that provides pressure relief when the pressure inside the tank of the water heater reaches its maximum. It’s a wise choice to install an expansion tank even if it’s not required by regulations since it protects your plumbing installations and your water heater from damage caused by high pressure.
Before buying just any expansion tank, check the manufacturer’s recommendations for your water heater on which size to buy. You will most probably need a 2-gallon or a 5-gallon expansion tank, which is compliant with a water heater of up to 50 and 100 gallons, respectively. When you buy a new tank, it usually comes with all the necessary hardware, however, your plumbing setup might differ from the hardware you get so it would be smart to check everything in advance.
It is installed between the cold water supply and the water heater, by attaching a tee-fitting on the pipe of the cold water supply. The easiest way for a novice DIY-er is to use push-fit fittings for the connections since they go directly onto the pipe and don’t require soldering.
Connecting the Heater
Once you have disconnected the wiring and water lines from the old heater and removed it, you can proceed with installing the new one.
Put the new water heater in place
It’s highly recommended to put a drain pan under the heater since it can prevent damage by flooding if the heater starts to leak in the future. Attach a drain pipe from the pan directly to the drain.
Checking the t&p valve
Most of the new heaters come with a new t&p relief valve, if yours doesn’t have one, wrap some plumbers tape on the threads of the new valve and simply twist it in tightly. Attach a drain pipe from the valve to a bucket
Connecting the water supply
First, wrap the hot and cold heat trap nipples with plumbers’ tape. Proceed to attach a flexible hose to the line in connection(cold) and the line out connection(hot). When you’ve tightened them, proceed to the next step.
Checking for leaks
Once everything is tight and connected, you can slowly turn the water supply back on. Keep a close watch on all the connections to see if there are any leaks. If there are leaks, try tightening the connections some more. When the tank has filled up, open the faucets at the highest point in your household so that the trapped air can escape from the tank and the water pipes.
Connecting the wiring
Remove the junction box cover which is located on the top of the heater or the side. If you took photos or marked the wires when you were disconnecting your old heater, reconnect them in the same manner. Close the cover and turn the power back on at the main circuit breaker panel.
Set the Temperature
Follow the steps in the user manual that you got with your new heater, on how to set the temperature of the water. Usually, 120 degrees is optimal.
Check the pressure
After a few hours have passed since you turned on the heater, go on and check the bucket beneath the t&p valve. If it has excess water in it, it means the pressure is too high and you’ll need to reduce it.
If you are a handyman by nature and have some plumbing and electrical knowledge, installing a new electric water heater can be a fun and fulfilling DIY project, however, if you feel you’re not up to the task, its best to leave things like this to professionals who have experience with plumbing and electrics like our team of licensed electricians, since the mistakes can be quite costly


